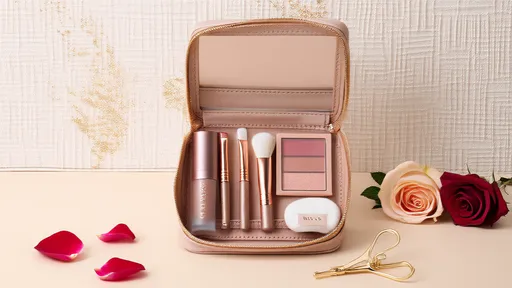
In the ever-evolving world of beauty tools, the humble makeup sponge has emerged as an unsung hero. Often overshadowed by high-tech brushes and fancy applicators, this squishy little wonder has quietly revolutionized how we apply foundation, concealer, and even powder products. The beauty blender, or as most call it, the makeup sponge, has become a staple in vanity cases worldwide for good reason - when used correctly, it can create the most seamless, airbrushed finish no brush can replicate.
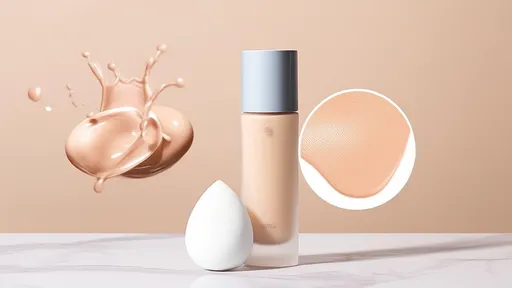
The magic of a makeup sponge lies in its unique texture and shape. Unlike flat pads of the past, today's premium sponges feature a bouncy, porous structure that absorbs just the right amount of product while allowing for buildable coverage. The teardrop design isn't just cute - the rounded bottom blends large areas like cheeks and forehead effortlessly, while the precision tip gets into the nooks around your nose and under eyes. Some versions even come with angled edges specifically designed to contour along cheekbones and jawlines.
Before you even think about dipping your sponge into product, preparation is key. Always start with a damp sponge - this might seem counterintuitive, but water actually prevents the sponge from absorbing too much of your expensive foundation. Run it under lukewarm water until it expands to about twice its original size, then squeeze out excess moisture so it's damp but not dripping. Some professionals swear by using setting spray instead of water for extra longevity, while others mix a drop of facial oil into the water for a dewier finish. Experiment to find what works best with your skin type and preferred makeup look.
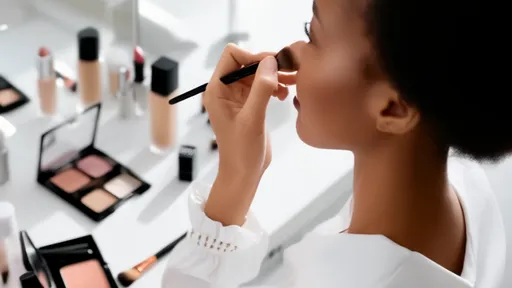
Application technique makes all the difference between a streaky mess and flawless skin. The golden rule? Never drag or swipe - always bounce or stipple. Gently press the sponge against your skin using a tapping motion, letting the porous surface do the blending work for you. Start with less product than you think you need; you can always build coverage in areas that need it. For liquid products, apply dots directly to your face first. With creams, scoop a small amount onto the back of your hand and dip the sponge in lightly. The bouncing technique not only gives better coverage but also stimulates blood flow for a healthy glow.
Cleaning might be the least glamorous part of sponge ownership, but it's absolutely crucial. A dirty sponge becomes a breeding ground for bacteria that can cause breakouts and skin irritation. Make it a habit to do a quick clean after every use with a gentle soap or specialized sponge cleanser. Once a week, give it a deep clean by soaking in warm, soapy water and squeezing repeatedly until the water runs clear. Never wring or twist your sponge - this can tear the delicate material. Instead, press between clean palms or roll gently on a towel. Store it in a breathable container, never airtight, to prevent mildew.
Not all makeup sponges are created equal. While the original Beautyblender set the standard, dozens of alternatives now flood the market at various price points. Premium options tend to have finer pores that don't absorb as much product, while cheaper versions may need more replacements over time. Some newer innovations include color-changing sponges that indicate when they're dirty, antimicrobial versions, and even sponges infused with skincare ingredients like charcoal or hyaluronic acid. When testing a new sponge, check for three things: how much it expands when wet, whether it maintains its shape after squeezing, and if it leaves any streaks when blending.
Beyond foundation, these versatile tools can handle nearly every step of your routine. Dampen just the tip to precisely pat on concealer without disturbing your color corrector underneath. Use a nearly dry sponge to press powder into your T-zone for lasting oil control. The rounded side works beautifully to blend cream blush for a natural flush. Some artists even use clean sponges to remove excess product - lightly roll over areas where you've applied too much highlighter or bronzer. For eyeshadow enthusiasts, a mini sponge can diffuse harsh lines in the crease better than most brushes.
Knowing when to retire your sponge is just as important as knowing how to use it. Even with perfect care, sponges have a limited lifespan. Most last 3-6 months with regular use before the texture changes and they start falling apart. Telltale signs it's time for a replacement include lingering smells even after washing, crumbling edges, or if it stops bouncing back to its original shape. Using an old sponge isn't just ineffective - it can harbor bacteria that lead to skin issues. Some environmentally conscious brands now offer recycling programs for used sponges, or you can repurpose old ones for arts and crafts.
The makeup sponge's rise to stardom in professional kits and everyday routines alike proves that sometimes the simplest tools yield the best results. In an industry constantly chasing the next innovation, this squishy little miracle reminds us that perfection often comes from technique rather than technology. Whether you're a makeup minimalist or a full-glam enthusiast, mastering the sponge might just be the game-changer your routine needs. Like any good relationship, it requires proper care and attention - but give it what it needs, and it will give you the skin of your dreams in return.
By /Jun 28, 2025

By /Jun 28, 2025
By /Jun 28, 2025
By /Jun 28, 2025

By /Jun 28, 2025
By /Jun 28, 2025
By /Jun 28, 2025
By /Jun 28, 2025

By /Jun 28, 2025
By /Jun 28, 2025
By /Jun 28, 2025

By /Jun 28, 2025

By /Jun 28, 2025
By /Jun 28, 2025

By /Jun 28, 2025
By /Jun 28, 2025

By /Jun 28, 2025
By /Jun 28, 2025